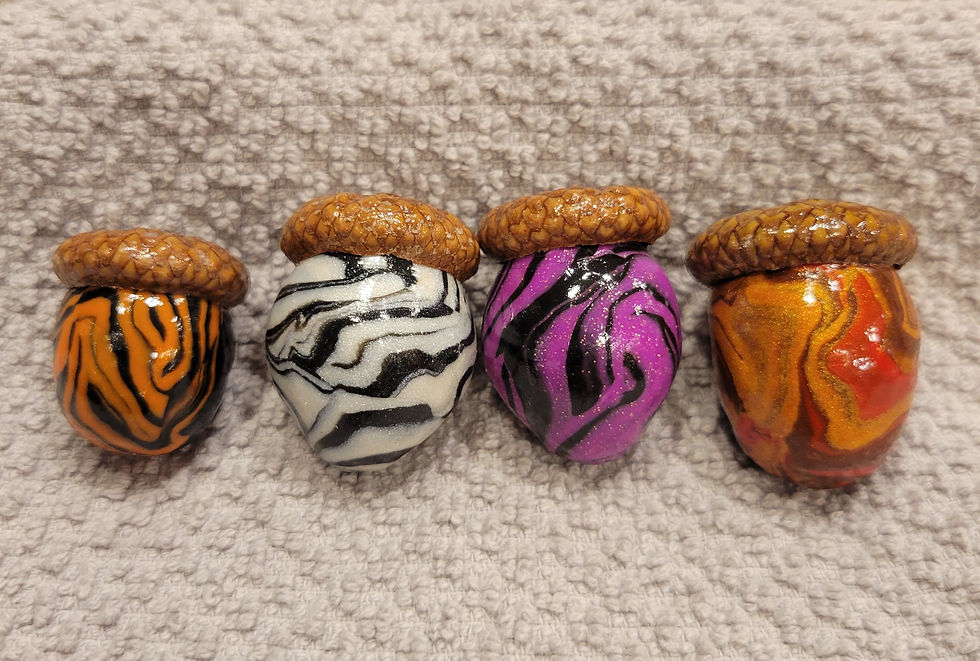
How to Make Marbled Clay Acorns (With Real Caps!)


If you love the look of natural fall decor but want a pop of color, making marbled polymer clay acorns is the perfect weekend project. By combining custom-blended clay with real acorn caps, you can create stunning, long-lasting bowl fillers that look festive. It is also a budget friendly craft that is easy and fun for all ages.
In this step-by-step tutorial, you will learn how to marble two or three clay colors, fit them to natural caps, bake them, glaze, and glue them to make colorful autumn decorations. I am using Fimo clay, but you can use Sculpey or another brand.
List of Supplies:
Acorn caps
Clay
Parchment paper
Baking sheet
Sandpaper
Glue
Glaze
Paint brush
Step 1. Gather acorn caps. I live in the country where there are a lot of Oak trees so there is usually an abundance of acorns on the ground every fall. I usually pick three or four handfuls in either a small brown paper bag or Ziploc bag. I pick both the caps and whole acorns so I can save the ones that are intact for other crafts. Once I have the amount I want, I rinse them off and set them on a paper towel on the counter for about an hour. If you do not have access to acorns, you can check your local craft store or check online.
Step 2. Set the oven temperature to 175 or 200 degrees F and line a baking sheet with parchment paper. Spread the acorns and caps on the parchment paper in a single layer. Put the baking sheet in the oven, leaving the oven door cracked open a little to allow moisture to escape. If they retain any moisture, they could become moldy. The caps will be ready after about 30 minutes. Remove them, set them aside to let them cool. The total baking time for the intact acorn will be 1 1/2 to 2 hours. When the time is up, remove them from the oven and set them aside to cool. Then store them for other activities.
Step 3. Place a piece of parchment paper on your work surface. Wash your hands to keep your skin oils and dirt from damaging your clay.
Step 4. Select the color or colors for your clay acorn. There are no rules - you can use one, two, or any number of colors you want. I prefer two or three because it creates a nice marbling effect. Once you have your colors selected, roll each color into a small round ball. (When sizing the clay, keep in mind that that when the clay balls are combined to make the acorn, the size will change and you don't want the "acorn" to be the wrong size for your acorn cap).

Step 5. Roll each ball into thick strings. Line them up next to each other, fold them in half, and twist them three or four times. Repeat this process two or three more times, then roll it into a ball and it should have a nice, marbled look.

Step 6. Mold your marbled clay balls the shape of an acorn by rolling and pinching. Flatten the top slightly and make sure it will fit snugly into one of the empty acorn caps. Set the caps aside while you bake the clay acorns.
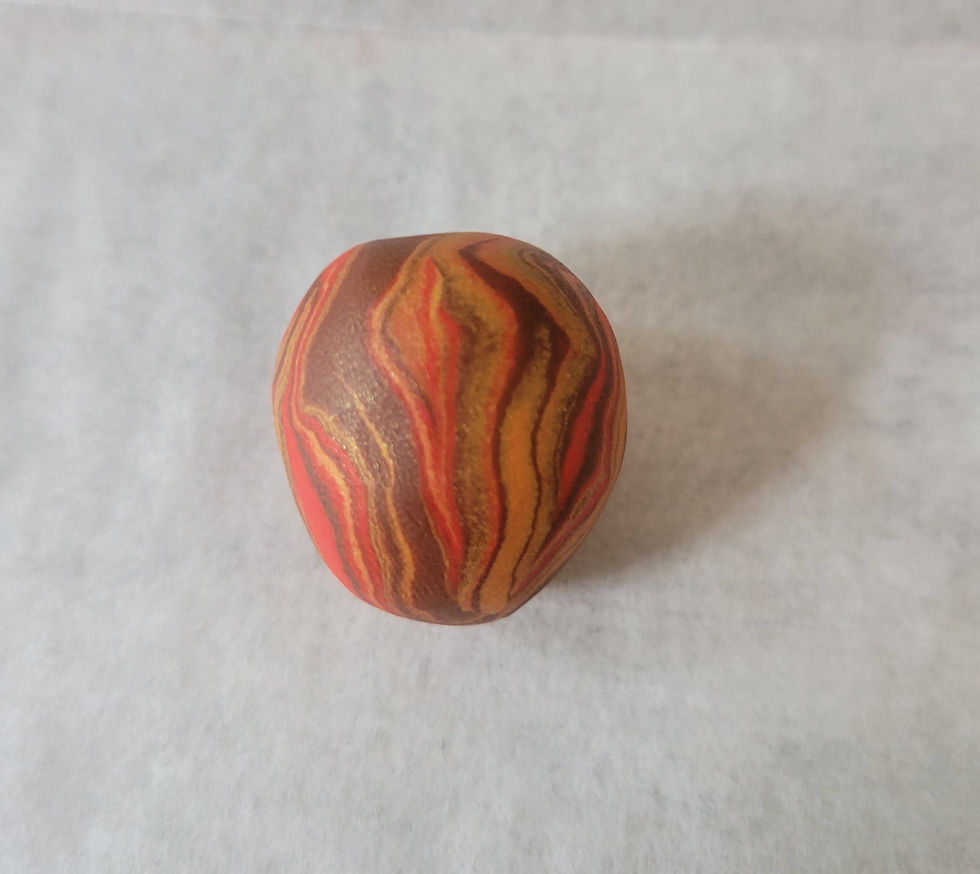
Step 7. Set over to 230 degrees F if you are working with Fimo clay or 275 degrees F if you are working with Sculpey clay. Always check the packaging of your clay to be sure of the oven temperature and baking times. Line a baking sheet with parchment paper. Set your clay acorn or acorns on the parchment paper and put them in the oven. Baking times are usually fifteen to thirty minutes per 1/4 inch of thickness. I usually don't leave my projects in the oven for more than thirty minutes but again, check the packaging or box your clay came in for instructions. Remove from the oven and set aside to cool. Thirty to sixty minutes should be enough.
Step 8. Using a small watercolor paintbrush, apply a thin coat of water-based polymer clay glaze on your marbled clay acorn and caps (I use Sculpey gloss glaze). Applying a thin coat will help avoid visible brush strokes, drips, and runs in the glaze. I usually apply two or three coats with a drying time of about thirty minutes between coats. When your acorn and caps have the desired coats of glaze, allow twenty-four hours for them to dry completely.

Step 9. Sand the top of your marbled clay acorn. Roughing the surface a little helps the glue adhere the tops to the acorn. Dab a few drops of glue to the inside of the cap and fit it securely onto the clay acorn. The best type of glue to use is probably a gel super glue, like Loctite Gel or Gorilla Super Glue Gel. I didn't have either, so I opted for Titebond Original Wood Glue. While it did work, I don't know if the bond will hold for long term and it's a yellow glue, so I had to be very careful to wipe up any drips, so I didn't discolor my acorn. Wipe any excess glue and hold the top on for a few minutes. Set aside to dry. Once dry, your marbled clay acorns are ready to display. You can fill a small clear glass bowl or a wide mouth short clear vase with your marbled clay acorns to use as a lovely autumn seasonal statement.